 This week’s cocktail doesn’t have a big back story or a sentimental attachment for me. Honestly, I’ve just always wanted an excuse to make a keg out of a watermelon, and what better reason, than to help you guys at home learn to make one! It’s really not that hard, but looks super impressive to all of your friends. You can get the tap at your

You can find different types of these small plastic taps at some liquor stores, and always on Amazon.
local big box store or if you are lucky enough to have a Liquor Barn, they usually have them. If you can’t find one, or you’re like me sometimes and you just don’t want to leave the house (OK, fine, I’ll always leave the house to go to my favorite liquor store…), you can always find what you need from Amazon, and for a slight fee, you can have it at your door in less than 24 hours. Really, they are going to rule the world one day.
So, since I don’t have a long story this week, let’s get right to the concocting!
First, go to your local farmers market and get a watermelon or two. I encourage you to buy

My melons from the Lexington Farmers Market!
local, because they really are the best fresh, and you’re helping out your local farmers. Also, they will have so many varieties to choose from! Usually, samples will be available, so you can decide which melon tickles your fancy. Buy a few. You can use one for your keg and another can be cut up for garnish. Do stick to the seedless varieties, though. You don’t want to have to go through the trouble of picking seeds out of your drink! This week, I chose a red seedless and an orange crisp. I used the orange crisp for the keg and liquid for the drink and the red seedless as the garnish.
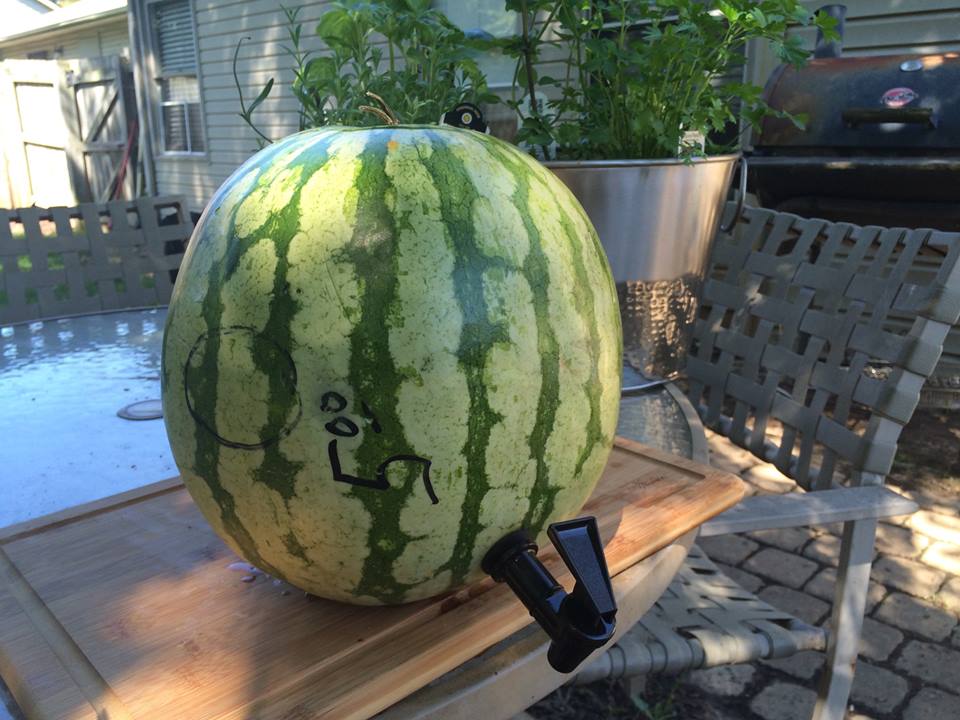
Display your watermelon keg on the table, or raise it up on a stand. It’s your choice. I chose to leave my pumpkin plain and not decorate it. The writing that the farmer did added a nice, personal touch for me, but you can decorate it in whatever way fits your theme. Let the kids help!
.
When making your keg, the first thing you want to do is cut off a small amount of the bottom of the melon, so that it will sit upright. This particular one had a pretty flat bottom, so I didn’t need to cut much off to get it to sit upright. When you are picking out your watermelon, look for one with a flatter end to use as your keg. It will make things easier when you are setting it up! I put mine on a wooden cutting board for display purposes and it will hang over the edge of the table so that drinks can be filled easily. You may choose to mount your higher, so that it can sit further back on the table, but still have room for glasses to fit under the tab comfortably.
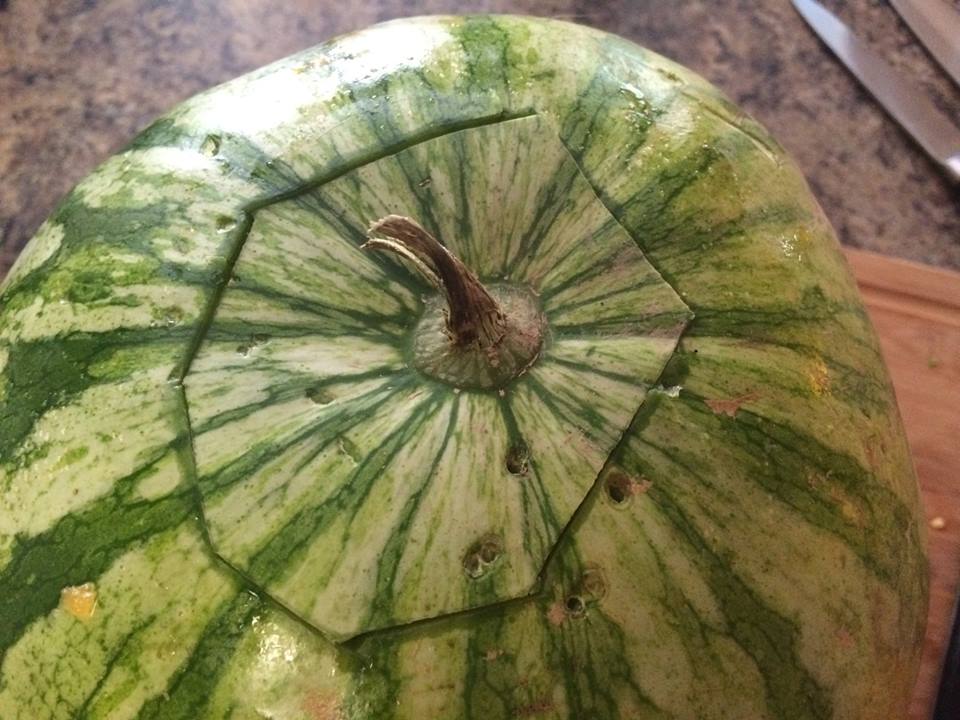
Cut a hole in the top, the same way you would a pumpkin before carving.
Now, cut the top off of the watermelon like you would a pumpkin before carving it. You will want to put the cap back on for presentation purposes. Make sure that the opening is large enough to get a serving spoon and your hand in it. You will be removing the insides, so you want plenty of room to work. Now that you have an upright sitting watermelon without a top, start digging out the insides and putting them in a separate bowl. Scrape the sides pretty well, just like you would a pumpkin. You can spoon the insides out, or if you break them up pretty good, you can dump it directly into the bowl. Don’t worry if there is a little liquid left in the bottom, you are putting most of this back in anyways.
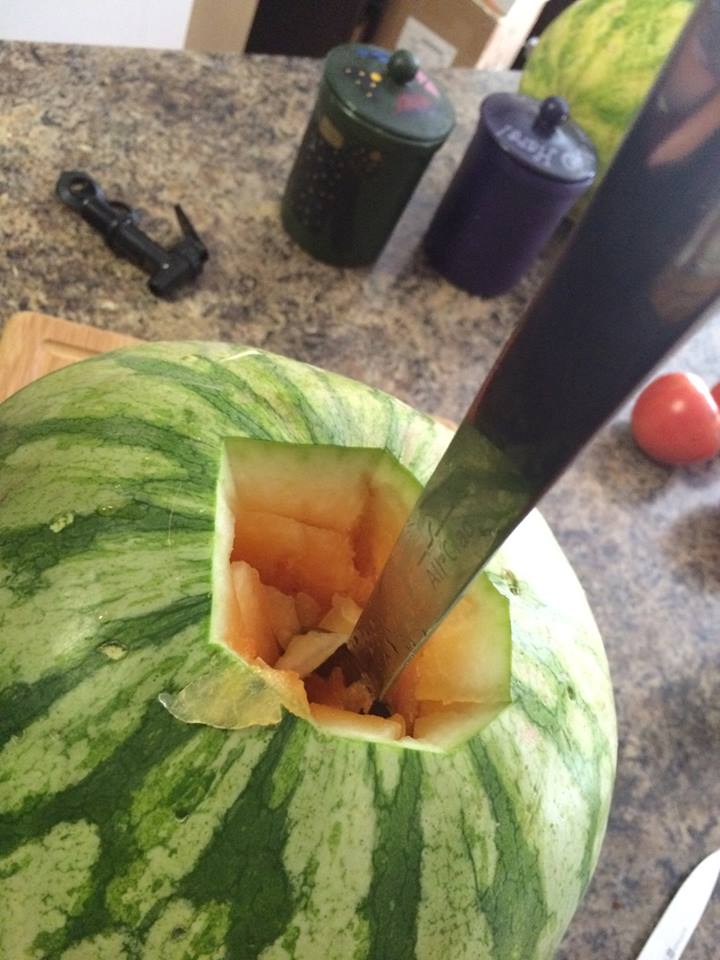
I used a spoon to break up the flesh, so that it was easier to remove.
Next, look for a good spot for your tap. You’ll want it to be close to the bottom, but not so far down that it’s inconvenient for filling drinks. About an inch off the table is about right. Take your knife and make a hole smaller the tap. You’re needing it just bug enough to be able to push the tap in. Make sure that you use the rubber pieces, so that you won’t have any leaks. One will go on the outside of the watermelon and the other on the inside before the tightening piece is screwed on. Once you have the tap inserted, you may have to dig a little around on the inside of the watermelon where the tap end is, so that you can attach the other rubber piece and tightening screw. Luckily, it’s pretty fleshy, so this is easy.
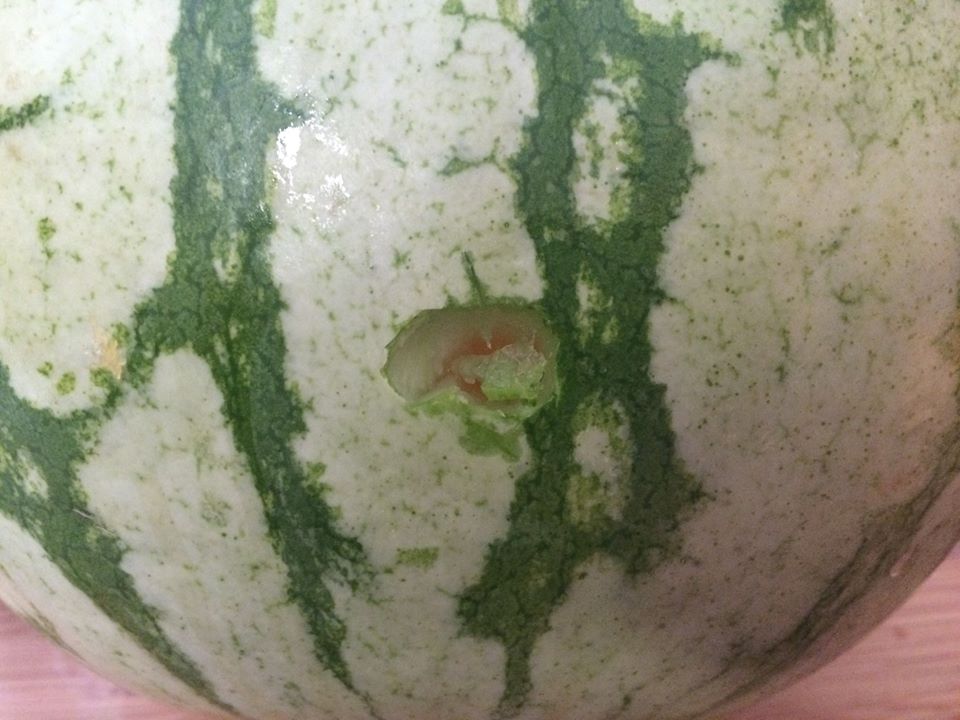
Make your hole slightly smaller than the end of your tap.
.
Set the watermelon keg aside, and take the insides that you have in the bowl and blend them in a blender. All of the watermelon flesh will probably not fit in your blender without making a giant mess, so you’ll have to do it in several rounds. Set on liquid, or whatever your equivalent is, and liquefy. I like to strain the liquid through a mesh sieve (the cheese cloth over a colander method would work here as well), just so my drinks are smoother, but this is your choice.
Now here is where you can decide how in-depth you want to get with your drink. You can take some of the watermelon liquid and

Watermelon insides!
make a simple syrup with it. It’s a one to one ratio, sugar to watermelon, over the stove on medium to high heat. You have to make you watch is as it starts to boil, or it will boil over and you will have a giant mess (this is one of those things that I know, because it happens to me all the time when I get side tracked!) Once the mixture comes to a boil, stir it for several minutes and remove from the heat. Let it cool before adding back into the rest of the watermelon water. The amount of simple syrup you need, depends on how sweet you want your drinks to be. You know your crowd, and if they like sweeter drinks, obviously make more syrup. I prefer less sweet drinks, so I did 3 cups of watermelon with 3 cups of sugar. You can choose to not make the

I like to strain the mix, so that my drinks are smoother, but if you like a pulpier feel, skip this step.
simple syrup and just go with the straight watermelon. At this point, you can do whatever drink you desire for your keg. Sangria, rum drinks, tequila, kid friendly with ginger ale, whatever your heart desires! Mix it up, and pour it into the waiting watermelon keg and enjoy!
Cut up some pieces of watermelon and put little slits in them to be used as a garnish and you’ll be the hostess with the mostest! You can also leave it just watermelon juice, and have it be a mixer for your guests to use. They can add their own choice of alcohol and amount, making the drink as sweet or not as they please. This is the method that I chose, since this is Cocktails with Cally, and I promised to show you that you can make pretty cocktails at home! The drink that I have chosen is salty sweet, with a little kick from some Ancho chili peppers! The recipe follows.

Kicked Up Watermelon Makes 1 cocktail
Ingredients:
2 shots of rum
1 shot of elderflower liquor (you can find this at most liquor stores, just ask someone working there and they can help you find it)
Splash of watermelon liquid
Splash of tonic water
Ancho Chili Salt Mix for your drinks rim (1 teaspoon each of Ancho Chili Powder, salt, and sugar)
Basil for muddling and garnish
Watermelon slice for garnish
Directions:
1. You’ll want to rim your glass first with the Ancho Chili mix. Take the Ancho Chili

Ancho Chili Mix for the rim of your glass.
powder, salt, and sugar and mix them together in a small bowl. Transfer to a small plate that is just larger than the rim of your glass. You can get a special package at the liquor store to wet the rim of the glass, so that the mixture sticks, but for today, I just used a wet sponge and ran it around the rim. When it’s wet, dip it and twist in the Ancho Chili mix, to cover the whole rim.
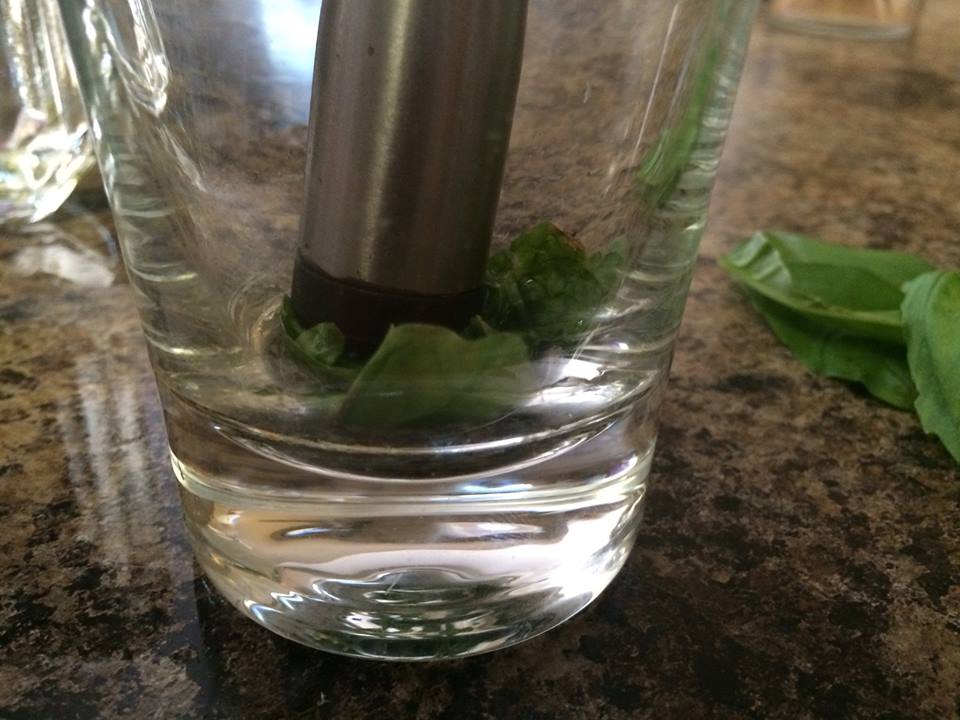
Muddle the basil to release its crisp flavor into your drink.
2. Take a few sprigs of your basil, more if you really like the flavor of basil, and muddle it in the bottom of your glass. If you don’t have a muddler, you can use a spoon. Really, you just want to bruise the leaves, so that flavor will infuse into your drink.
.
3. After you have muddled a few leaves, add two or three more leaves that will be a pretty garnish when you add the ice and liquids. Add ice to fill at least half way up the glass.
4. Pour in shots of rum and elderflower liquor.
.
5. Add a splash of watermelon liquid from your keg and a splash of tonic water. Taste it and if it is too sweet for you, add some more tonic water. Not sweet enough, add a little more watermelon.
.
6. Garnish with a watermelon wedge and enjoy!
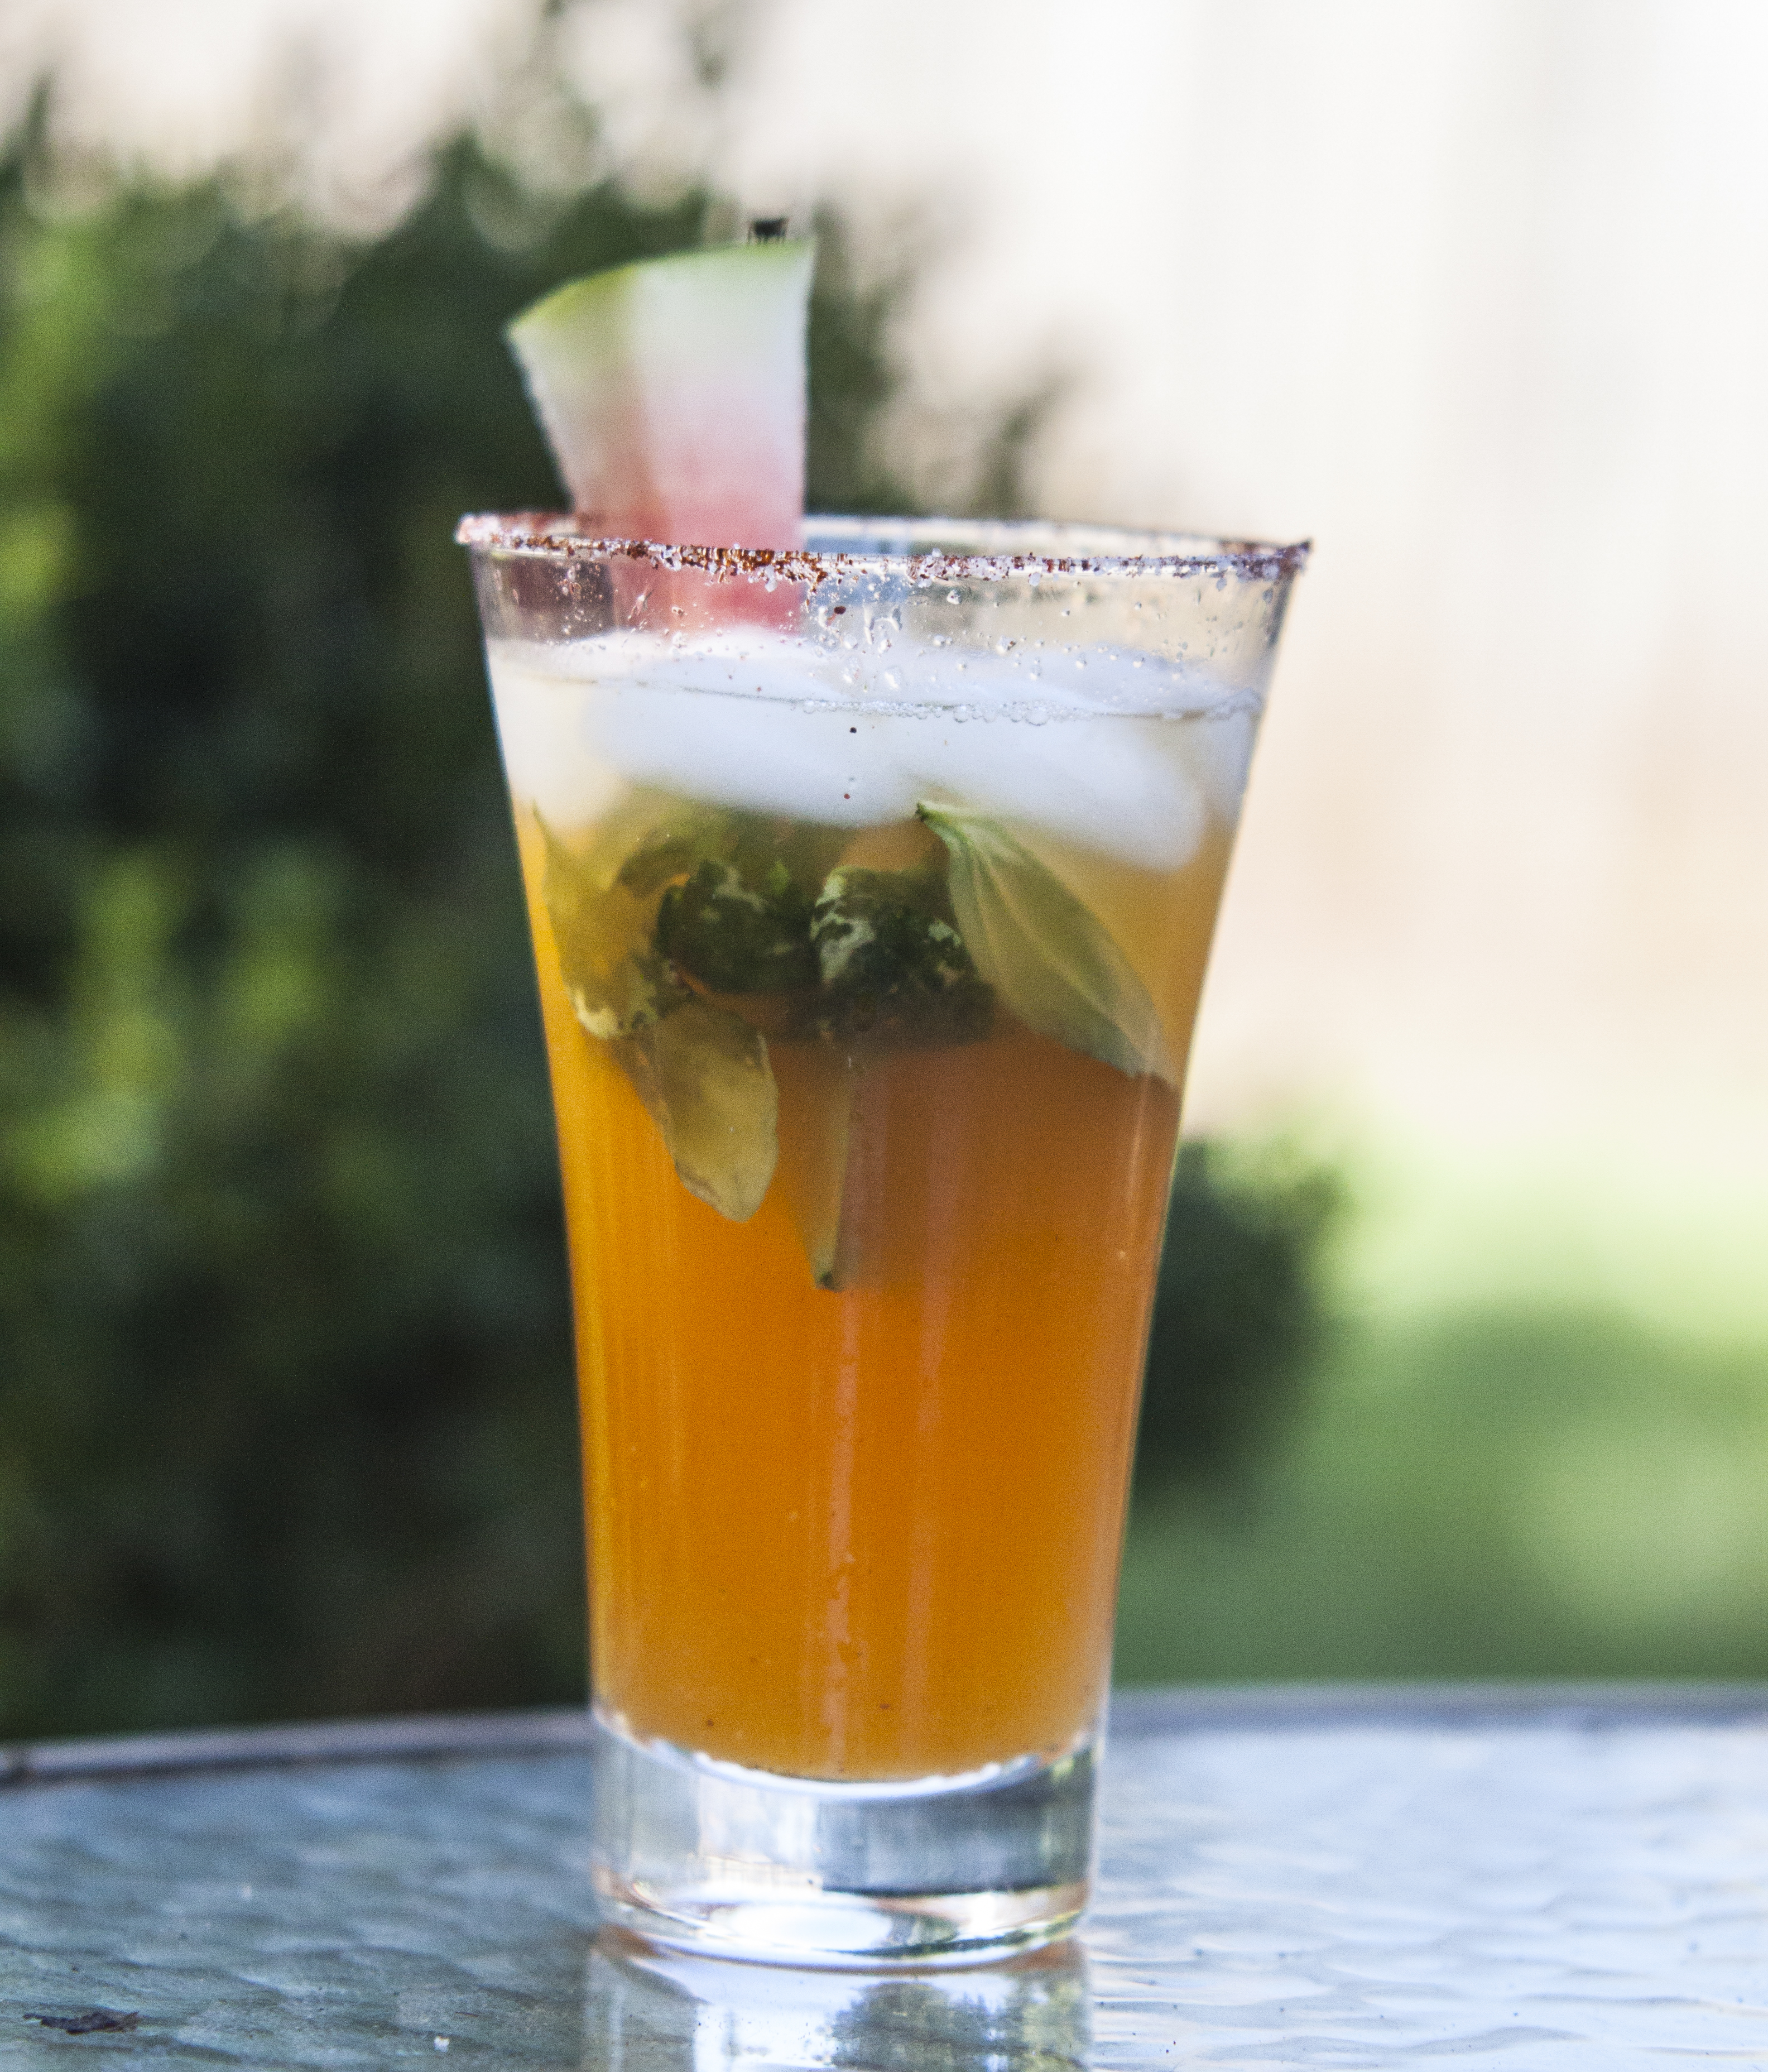
This finished product!
You can set ingredients up and guests can serve themselves. Leave a little card out with the directions to the drink and they can have fun! If you have a larger crowd, you can make extra of all of your drink or mix, keep it in the fridge and refill your keg as needed. Like I mentioned above, you can have other liquors, add ins, and garnishes displayed as well, and your guests can make their own cocktails, using the watermelon as their mixer! Let them have fun, and you will the envy of all the late summer parties in your neighborhood!

